Let’s face it, folks—melting chocolate is one of those kitchen skills that can turn a simple dessert into pure magic. Whether you're making chocolate-covered strawberries, ganache, or just trying to avoid a burnt mess, knowing how to melt chocolate properly is a game-changer. But here’s the thing—melting chocolate isn’t as straightforward as it seems. There are pitfalls, tricks, and techniques you need to master if you want that silky-smooth result. So, buckle up, because we’re diving deep into the world of chocolate melting, and by the end of this, you’ll be a certified chocolate whisperer.
Now, I get it—sometimes melting chocolate feels like a high-stakes situation. One wrong move, and you’ve got a clumpy, grainy disaster on your hands. But fear not! This guide will break down everything you need to know about how to melt chocolate like a pro, from the tools you’ll need to the methods that work best. We’ll even cover some troubleshooting tips in case things go south.
Before we dive into the nitty-gritty, let me just say this: melting chocolate doesn’t have to be intimidating. With the right approach, patience, and a little bit of love, you’ll be churning out perfectly melted chocolate in no time. So, grab your chocolate, your spatula, and let’s get cooking!
- Is Billie Eilish Gay Unpacking The Conversation Around Her Identity
- Wendy Ortiz Nip Slip The Story Behind The Viral Moment
Table of Contents
- What Tools Do You Need to Melt Chocolate?
- Popular Methods for Melting Chocolate
- Microwave Magic: Melting Chocolate in the Microwave
- Double Boiler Delight: The Classic Method
- Bain-Marie Basics: A French Twist on Chocolate Melting
- Getting the Temperature Just Right
- Pro Tips for Perfectly Melted Chocolate
- Troubleshooting Common Chocolate Melting Mistakes
- Creative Recipes Using Melted Chocolate
- Wrapping It Up: Your Chocolate Melting Journey Awaits
What Tools Do You Need to Melt Chocolate?
Alright, let’s talk tools. When it comes to melting chocolate, having the right equipment can make all the difference. Here’s a quick rundown of what you’ll need:
- Microwave-Safe Bowl: If you’re going the microwave route, you’ll need a bowl that can handle the heat without melting or cracking.
- Double Boiler: A classic setup for stovetop melting. If you don’t have one, don’t worry—you can DIY it with a heatproof bowl and a saucepan.
- Thermometer: A candy thermometer or instant-read thermometer is your best friend when it comes to monitoring the temperature of your melted chocolate.
- Spatula: Silicone spatulas are great for stirring chocolate without scratching your bowls or pans.
- Chocolate Chunks: Breaking your chocolate into small, even pieces helps it melt more evenly.
Now that you’ve got your tools ready, let’s move on to the methods. But first, a quick note: always make sure your tools are completely dry. Even a tiny drop of water can cause your chocolate to seize up. Nobody wants that!
Popular Methods for Melting Chocolate
There’s more than one way to skin a cat—or in this case, melt chocolate. Depending on your preferences and the tools you have on hand, you can choose from several methods. Here’s a quick overview:
Microwave Magic: Melting Chocolate in the Microwave
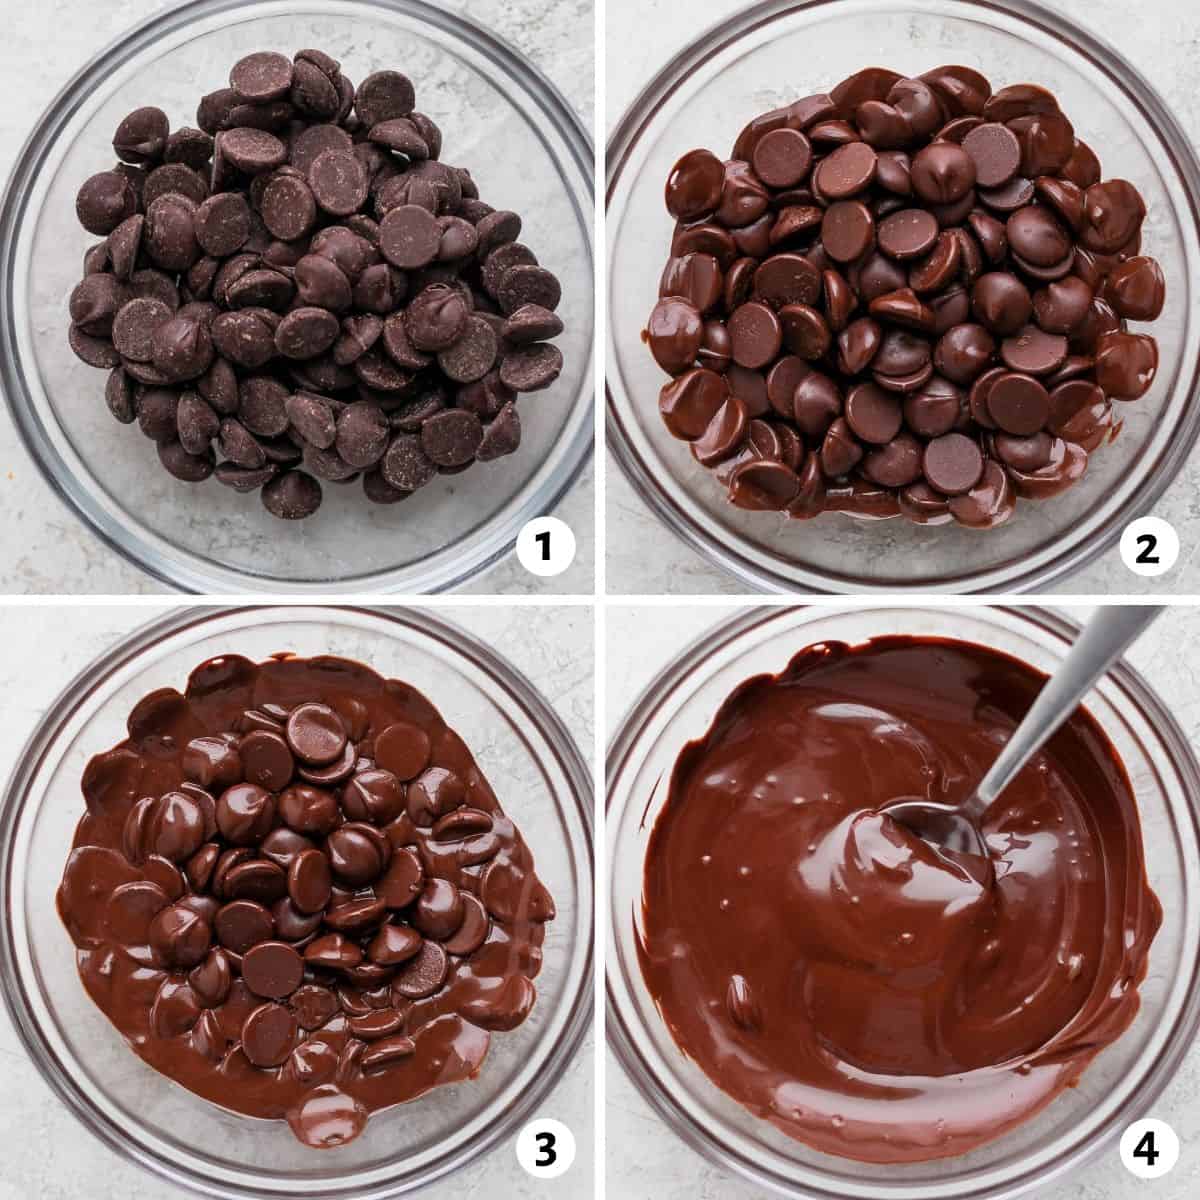
The microwave is a quick and easy way to melt chocolate, but it requires a bit of finesse. The key is to melt the chocolate slowly, in short bursts, to avoid overheating. Here’s how:
- Place your chocolate chunks in a microwave-safe bowl.
- Microwave on high for 30 seconds, then stir.
- Repeat in 15-second intervals, stirring after each burst, until the chocolate is fully melted.
Pro tip: Dark chocolate can usually handle higher temperatures, while milk and white chocolate are more delicate and require lower power settings.
Double Boiler Delight: The Classic Method
If you’re looking for precision, the double boiler is the way to go. This method involves placing your chocolate in a bowl over simmering water, which gently heats it without direct contact with the flame. Here’s how:
- Fill a saucepan with about an inch of water and bring it to a simmer.
- Place your chocolate chunks in a heatproof bowl that fits snugly over the saucepan.
- Stir the chocolate constantly as it melts, ensuring an even temperature.
This method is especially great for melting larger quantities of chocolate or when you’re working with sensitive types like white chocolate.
Bain-Marie Basics: A French Twist on Chocolate Melting
The bain-marie is essentially a French version of the double boiler. It works on the same principle but often involves a water bath. Here’s how to do it:
- Preheat your oven to a low temperature (around 150°F or 65°C).
- Place your chocolate in a heatproof bowl and set it in a larger pan filled with hot water.
- Let the chocolate melt slowly in the oven, stirring occasionally.
This method is perfect for when you’re multitasking in the kitchen or want a super gentle melting process.
Getting the Temperature Just Right
Temperature control is key when it comes to melting chocolate. Different types of chocolate have different melting points, so it’s important to know what you’re working with:
- Dark Chocolate: Melts best between 115°F (46°C) and 120°F (49°C).
- Milk Chocolate: Melts between 105°F (40°C) and 115°F (46°C).
- White Chocolate: Melts at the lowest temperature, around 100°F (38°C) to 110°F (43°C).
Using a thermometer is crucial here. Overheating your chocolate can cause it to seize or burn, so keep a close eye on the temperature. And remember, patience is a virtue when it comes to melting chocolate!
Pro Tips for Perfectly Melted Chocolate
Now that you’ve got the basics down, here are a few pro tips to take your chocolate melting game to the next level:
- Chop It Fine: Breaking your chocolate into small, even pieces ensures it melts evenly.
- Use Quality Chocolate: Higher-quality chocolate will melt better and taste better in your final dish.
- Avoid Overheating: Always melt chocolate slowly and at a low temperature to prevent seizing.
- Add a Bit of Butter: For extra shine and smoothness, mix in a small amount of butter while melting.
- Don’t Rush It: Take your time and stir frequently to achieve that velvety texture.
These tips might seem simple, but they can make a world of difference in your final result.
Troubleshooting Common Chocolate Melting Mistakes
Even the best of us make mistakes sometimes. Here are some common issues you might encounter when melting chocolate, along with solutions:
Seized Chocolate
Seizing happens when moisture comes into contact with melted chocolate, causing it to become grainy and stiff. To fix it, try adding a small amount of milk or butter to the chocolate and stirring vigorously.
Overheated Chocolate
If your chocolate gets too hot, it can burn or become clumpy. To avoid this, always melt chocolate slowly and at a low temperature. If it does overheat, try whisking in a bit of cream or butter to salvage it.
Uneven Melting
This usually happens when your chocolate chunks are too large or uneven. To prevent it, chop your chocolate into small, uniform pieces before melting.
Creative Recipes Using Melted Chocolate
Now that you’ve mastered the art of melting chocolate, it’s time to put your skills to use. Here are a few delicious recipes to try:
Chocolate Ganache
A rich, creamy ganache is a must-have for any chocolate lover. Simply heat heavy cream until it simmers, pour it over melted chocolate, and stir until smooth. Use it as a frosting, filling, or dip—it’s versatile and irresistible.
Chocolate-Covered Strawberries
Who doesn’t love chocolate-covered strawberries? Dip fresh strawberries into your melted chocolate, let them cool, and enjoy a sweet treat that’s perfect for any occasion.
Homemade Chocolate Bars
Why settle for store-bought chocolate when you can make your own? Pour melted chocolate into molds, add your favorite mix-ins (nuts, dried fruit, sprinkles), and let it set in the fridge for a DIY chocolate bar that’s all your own.
Wrapping It Up: Your Chocolate Melting Journey Awaits
There you have it, folks—a comprehensive guide to how to melt chocolate like a pro. Whether you’re using the microwave, a double boiler, or a bain-marie, the key is patience, precision, and a little bit of love. Remember to keep an eye on the temperature, use quality chocolate, and don’t be afraid to experiment with different methods and recipes.
Now that you’ve got the skills, it’s time to put them into practice. So go ahead, melt some chocolate, and create something delicious. And when you’re done, don’t forget to share your creations with friends and family—or better yet, come back and tell us all about it in the comments below. Happy melting, and may your chocolate adventures be smooth and sweet!


Detail Author:
- Name : Mr. Ignatius Blick DVM
- Username : gleason.lora
- Email : vonrueden.amanda@ratke.biz
- Birthdate : 1996-05-08
- Address : 4388 Esperanza Burgs Lexieberg, ME 80749-9017
- Phone : 718.246.2182
- Company : Heller-Effertz
- Job : Special Education Teacher
- Bio : Qui accusantium perspiciatis ex eos. Vero sunt eos hic. Dicta repudiandae sed et et eaque nihil ab soluta.
Socials
instagram:
- url : https://instagram.com/larue_conroy
- username : larue_conroy
- bio : A unde sequi nemo eveniet qui animi. Quas aut sit neque aut exercitationem.
- followers : 4574
- following : 1039
tiktok:
- url : https://tiktok.com/@larue.conroy
- username : larue.conroy
- bio : Numquam excepturi officia consequatur qui. Id ullam et amet illum.
- followers : 2023
- following : 1866
facebook:
- url : https://facebook.com/larue.conroy
- username : larue.conroy
- bio : Nihil corporis fuga maiores voluptate sed et omnis.
- followers : 3261
- following : 844
