So here’s the deal, my friend. If you’ve ever wondered how to make a bow out of ribbon, you’re in the right place. This isn’t just some random craft project—it’s a skill that can seriously elevate your DIY game. From wrapping gifts like a pro to adding a pop of personality to your outfits, mastering this technique is about to become your new favorite hobby. Stick around, and I’ll show you exactly how it’s done!
You know what’s cool? Making bows is one of those skills that seems harder than it actually is. Sure, you might’ve seen those perfectly symmetrical bows at the store and thought, “There’s no way I could do that.” But guess what? You totally can. All you need is a bit of ribbon, some patience, and maybe a glass of your favorite drink by your side. Let’s dive in, shall we?
Now, before we get started, let me give you a little heads-up. This guide isn’t just going to teach you the basics of how to make a bow out of ribbon. We’re also going to cover some pro tips, common mistakes to avoid, and even ways to personalize your creations. By the end of this, you’ll be crafting bows like a pro, and who knows? You might even start selling them on Etsy. Let’s roll!
- Are You Sure About That Exploring The Depths Of Certainty And Doubt
- Sophie Rain Spiderman Video Oficial The Ultimate Guide For Fans
Why Should You Learn How to Make a Bow Out of Ribbon?
Alright, let’s talk about why this skill is worth your time. First off, bows are freaking awesome. They’re versatile, stylish, and add a touch of elegance to pretty much anything. Whether you’re wrapping a birthday gift, decorating your home for the holidays, or accessorizing your outfit, a handmade bow can make all the difference. Plus, it’s a super affordable way to add some flair to your life.
Here’s another cool thing: learning how to make a bow out of ribbon is a great way to bond with your friends or family. Imagine hosting a little DIY crafting session where everyone gets to make their own bows. It’s fun, creative, and a great way to spend quality time together. And hey, you’ll have some pretty sweet souvenirs to show for it!
What You’ll Need to Get Started
Before we dive into the nitty-gritty, let’s talk about the tools and materials you’ll need. Don’t worry, it’s not complicated. Here’s a quick rundown:
- Fc Barcelona Vs Real Madrid Lineups The Ultimate Clash In La Liga
- Feliz Dia De Las Madres Celebrating The Heart Of The Family
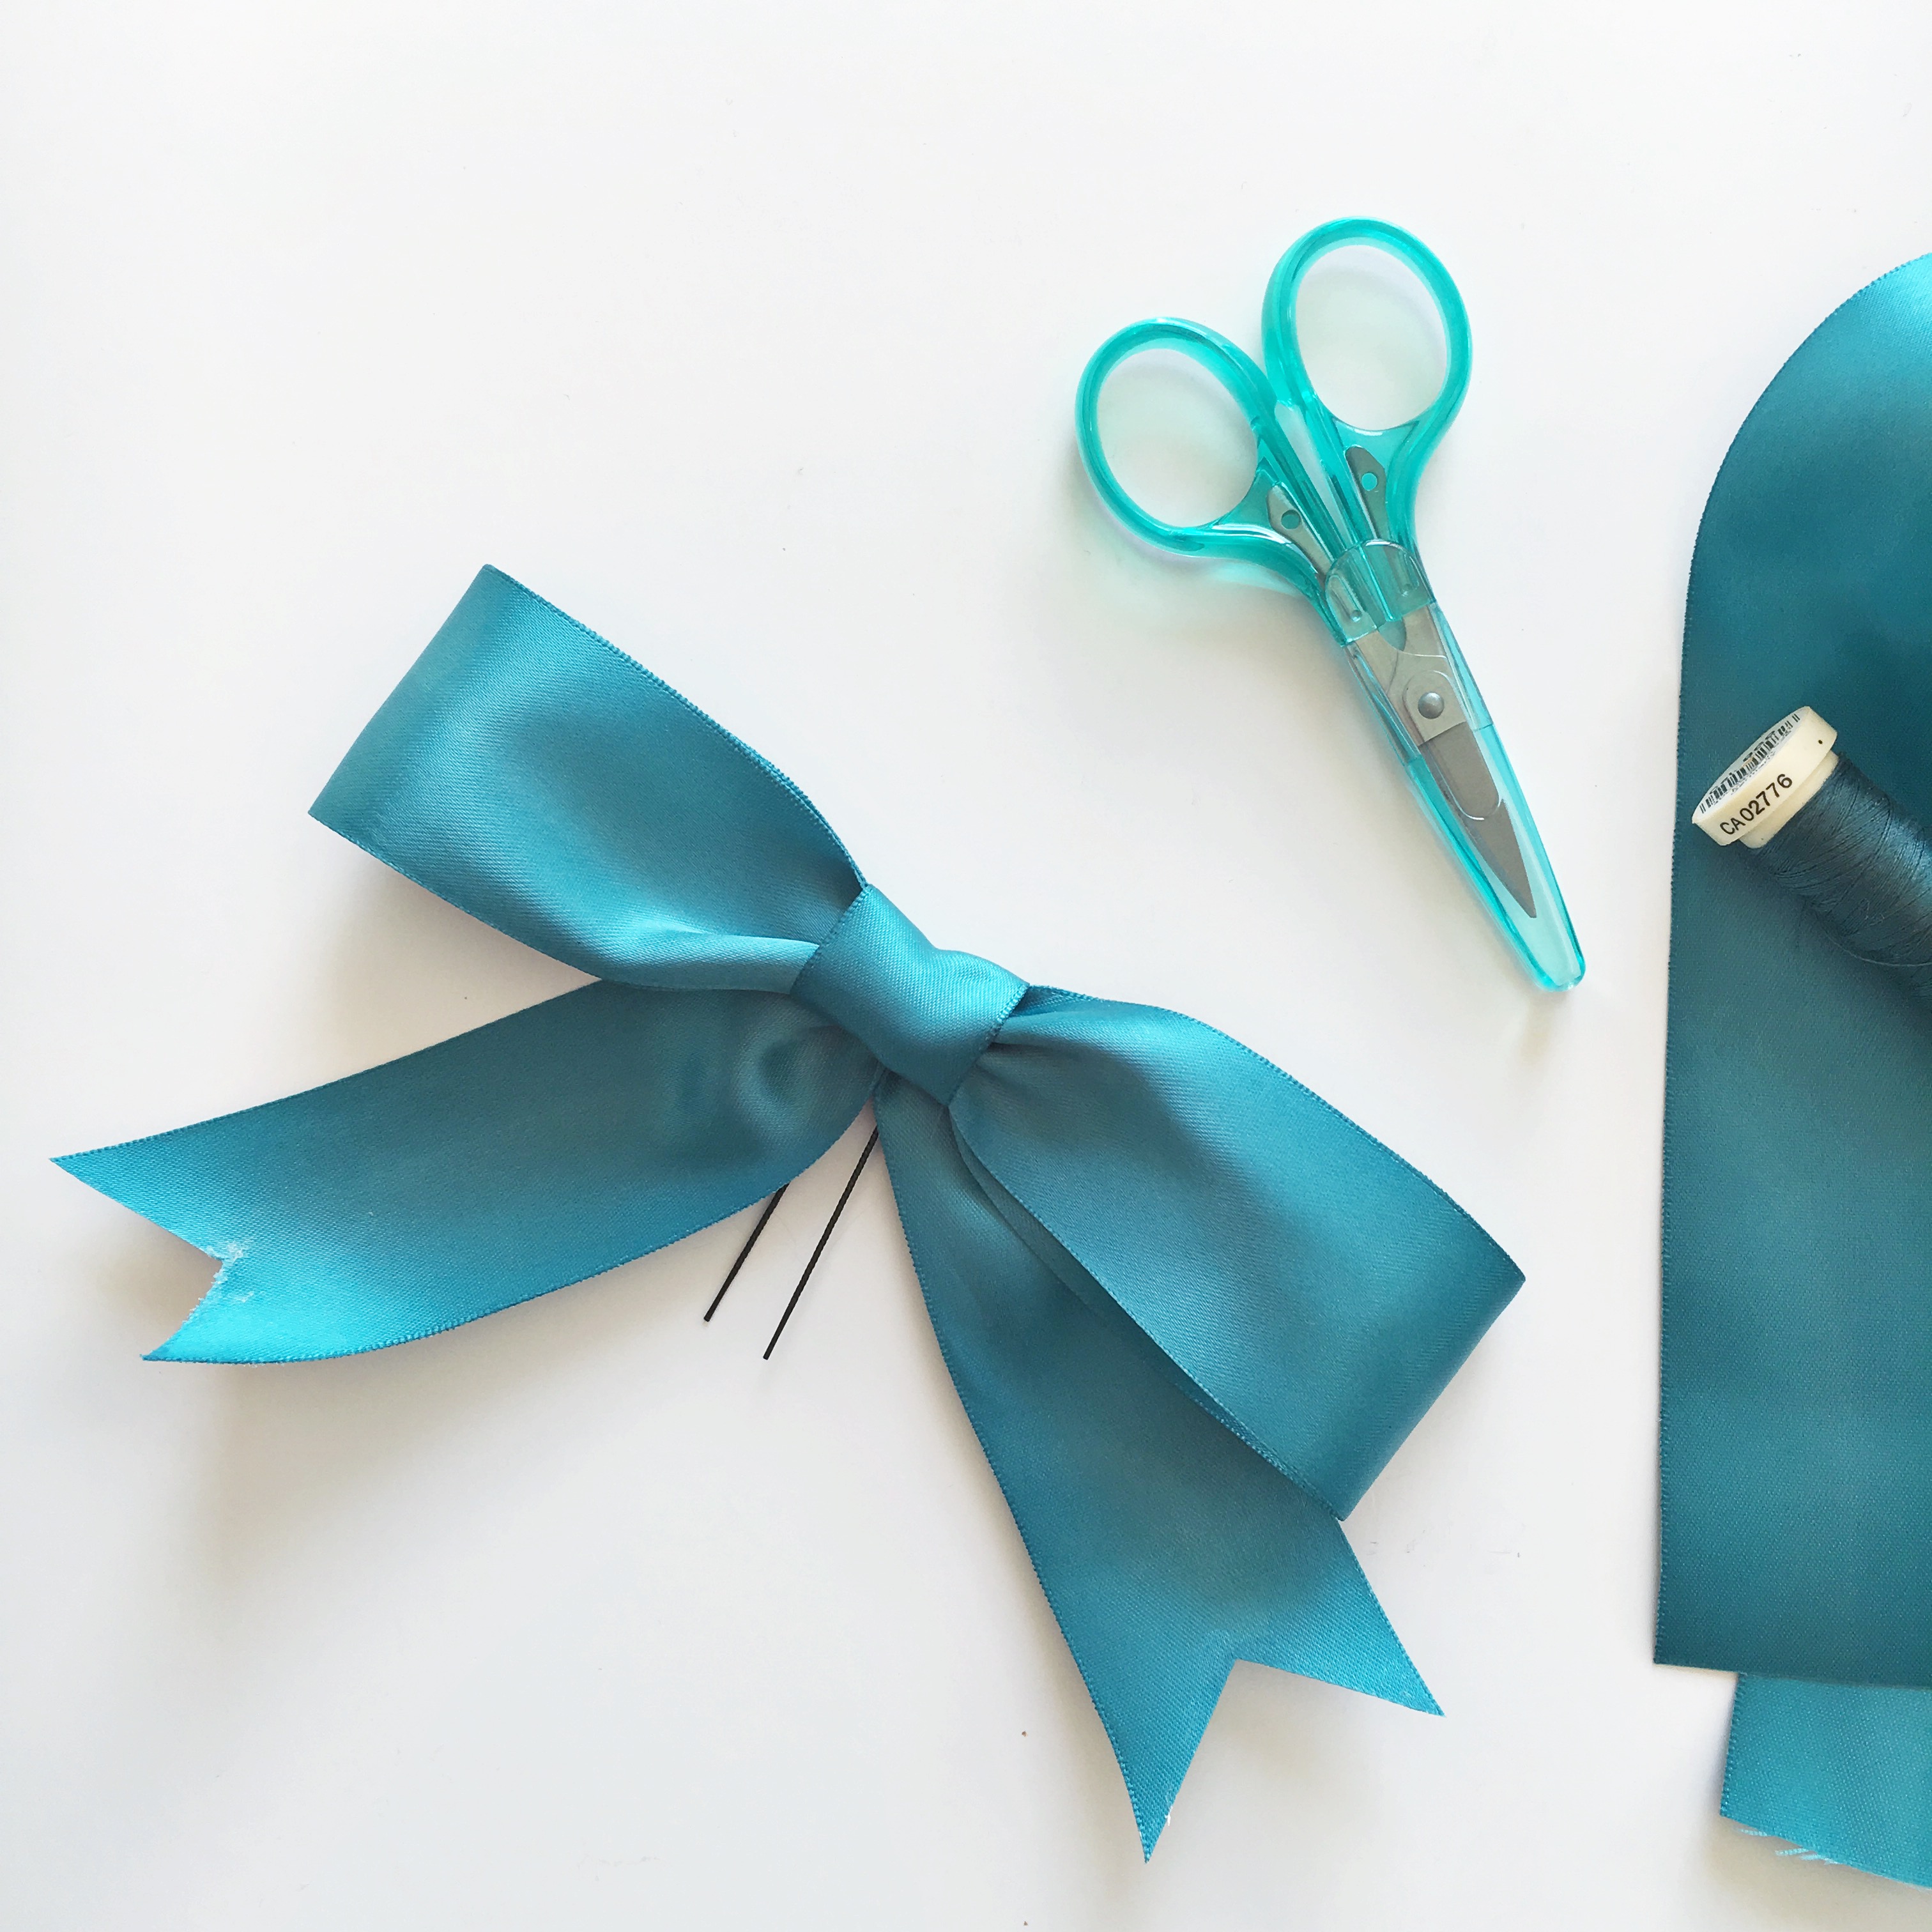
- Ribbon (your choice of width, color, and material)
- Scissors (sharp ones work best)
- A hot glue gun or regular glue (optional, depending on your project)
- A wire-edged ribbon (if you want your bow to hold its shape better)
- A piece of floral wire or twist tie (for attaching the bow to your project)
Pro tip: If you’re new to this, start with a ribbon that’s easy to work with, like satin or grosgrain. Once you’ve mastered the basics, you can experiment with different textures and patterns.
Step-by-Step Guide: How to Make a Bow Out of Ribbon
Now that you’ve got your materials ready, let’s break down the process step by step. Trust me, it’s easier than it looks. Follow along, and you’ll have a beautiful bow in no time.
Step 1: Choose Your Ribbon
The first step is picking the right ribbon for your project. Think about the occasion, the color scheme, and the overall vibe you’re going for. For example, if you’re wrapping a gift for a baby shower, you might want to go with soft pastel colors. But if you’re decorating for Halloween, something bold and spooky might be more fitting.
Step 2: Measure and Cut Your Ribbon
Next up, measure and cut your ribbon. The length will depend on how big you want your bow to be. As a general rule of thumb, a 24-inch piece of ribbon works great for a medium-sized bow. If you want something larger or smaller, adjust accordingly.
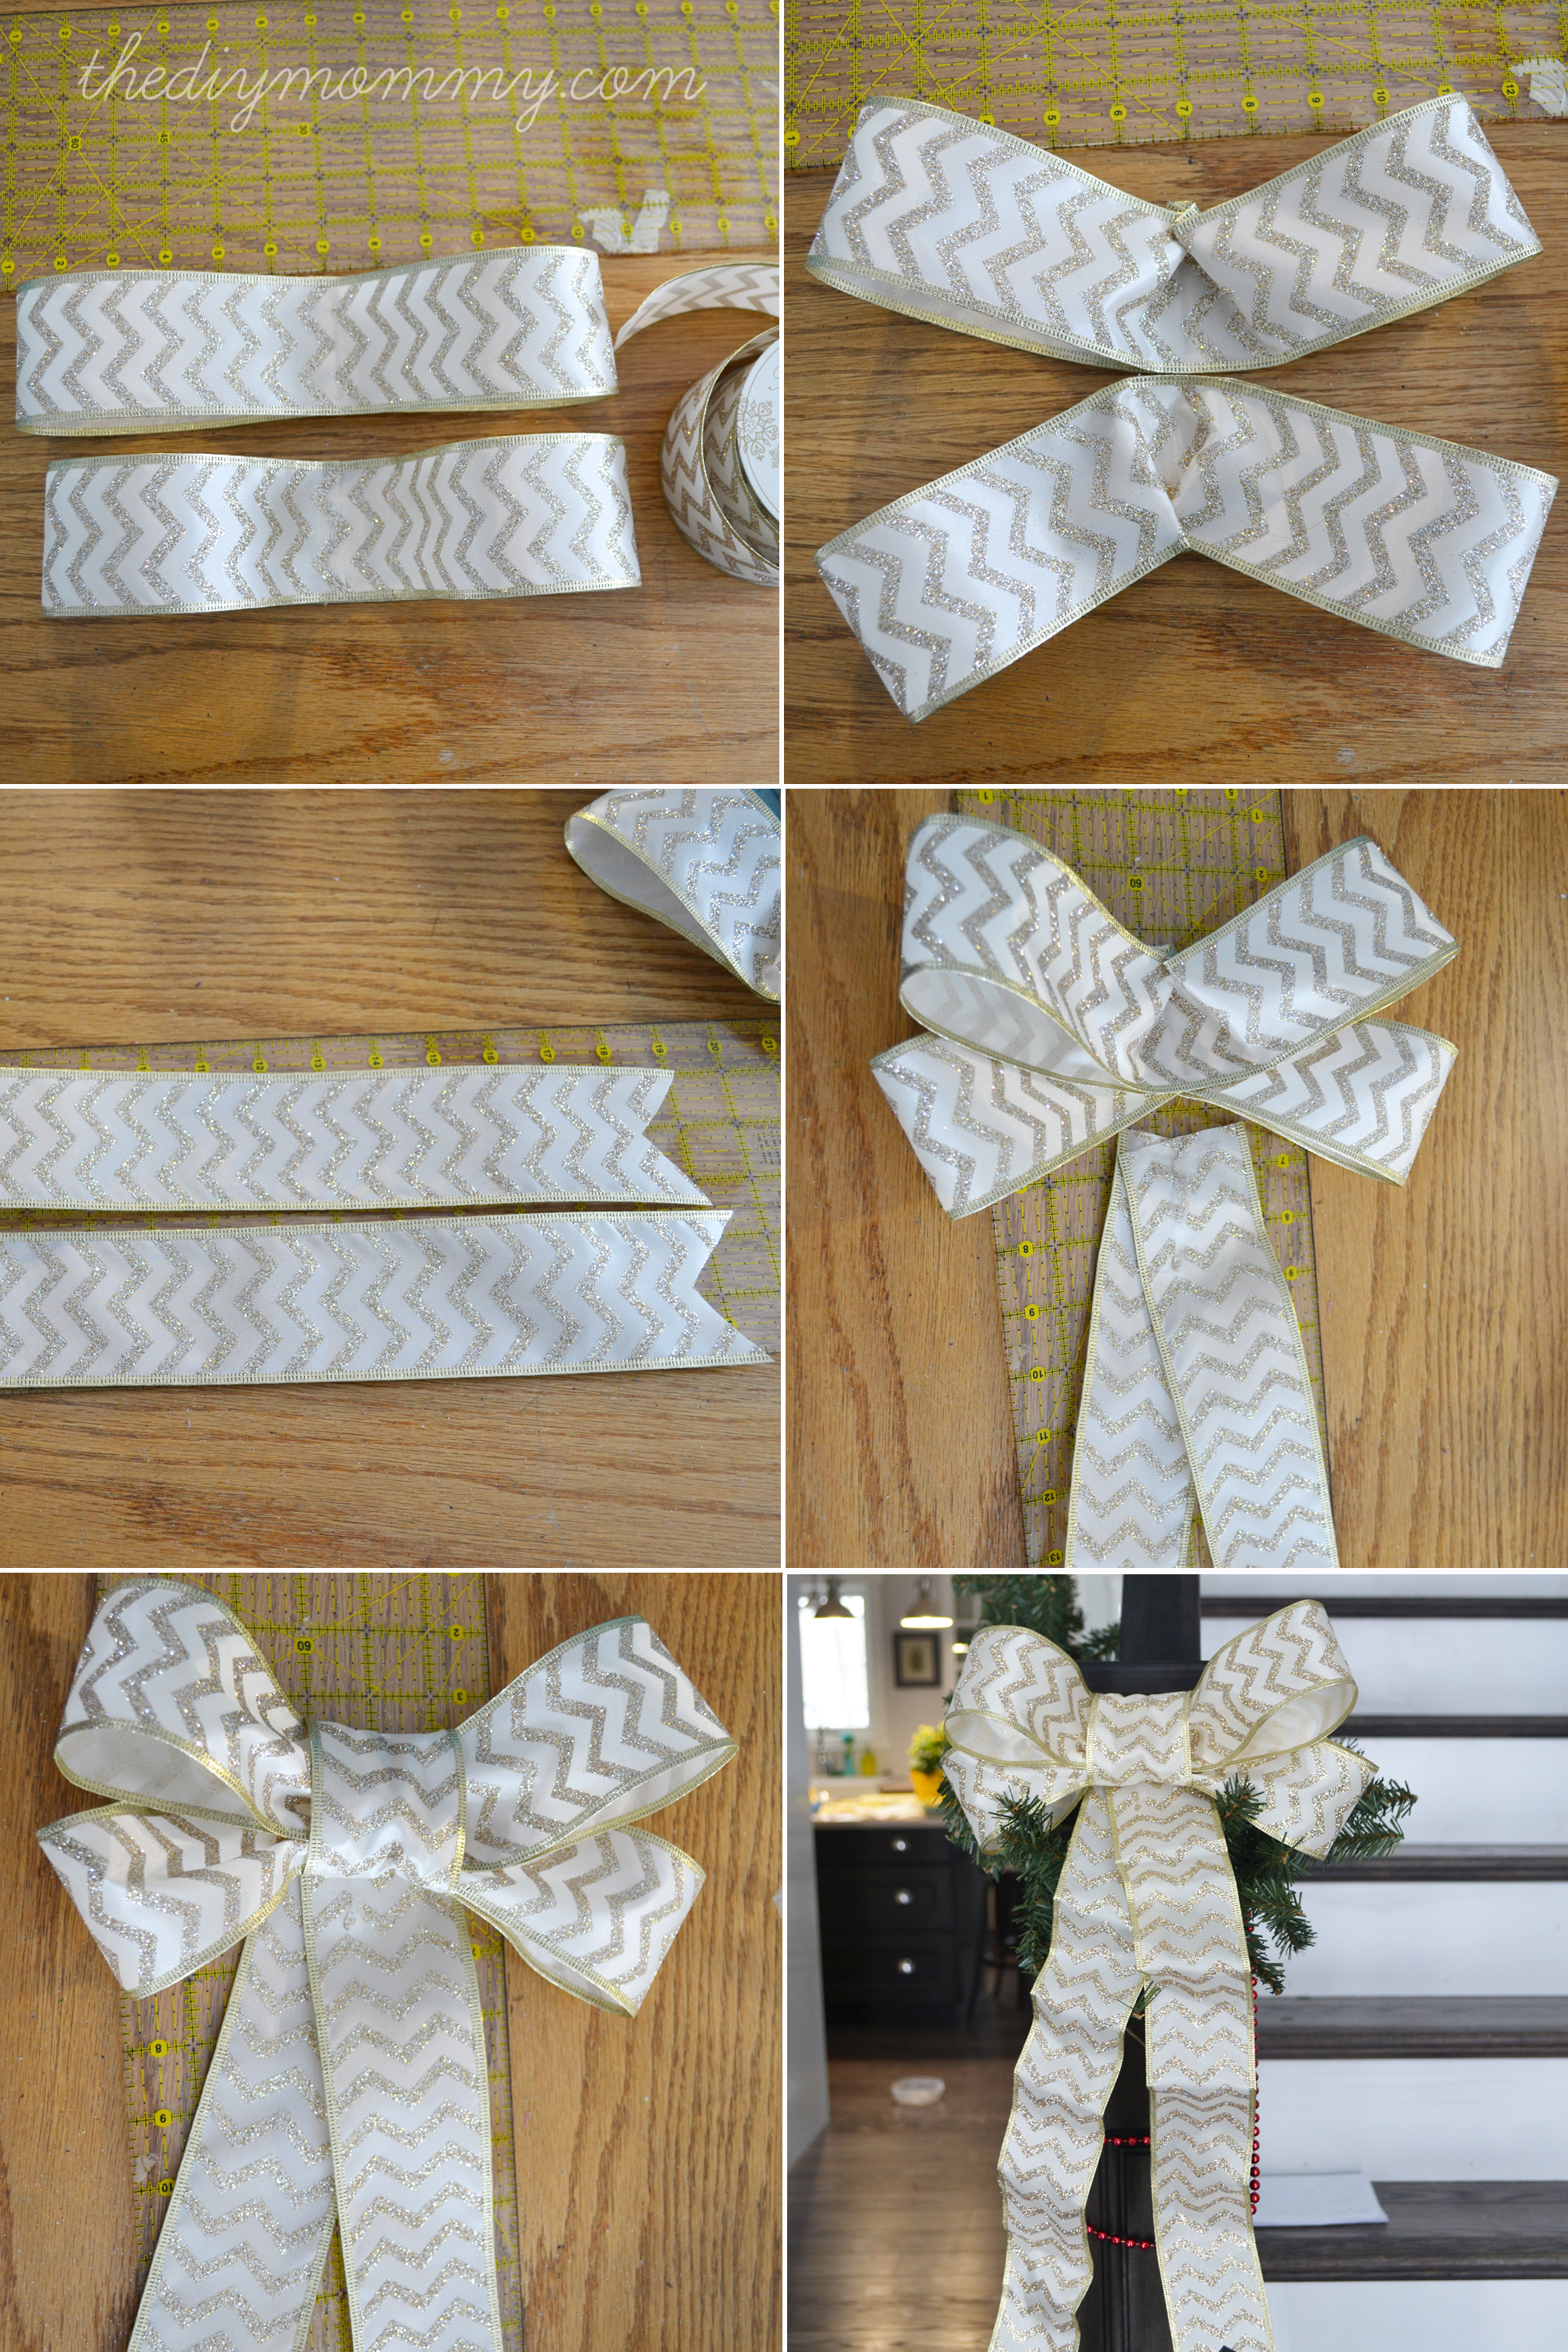
Step 3: Create the Loops
This is where the magic happens. Take one end of the ribbon and fold it into a loop. Then, take the other end and create a second loop, making sure they’re the same size. Hold them together with your fingers or a small piece of floral wire.
Step 4: Add the Center Knot
Now, take the remaining ribbon and wrap it around the center of the loops to create a knot. This is what holds everything together. Make sure it’s tight and secure, but not so tight that it squishes the loops out of shape.
Step 5: Trim the Ends
Once your bow is shaped the way you want it, it’s time to trim the ends. You can cut them straight across, diagonally, or even in a zigzag pattern for a fun twist. Just make sure they’re even on both sides.
Step 6: Attach Your Bow
Finally, attach your bow to whatever you’re decorating. If you’re wrapping a gift, you can use tape or glue to secure it in place. For hair accessories or clothing, a hot glue gun works wonders. And if you’re attaching it to something like a wreath, floral wire is your best bet.
Tips and Tricks for Perfecting Your Bows
Now that you’ve got the basics down, let’s talk about some tips and tricks to take your bows to the next level. These little hacks can make a huge difference in the final result.
- Use wire-edged ribbon: This type of ribbon has a thin wire embedded in the edges, which helps it hold its shape better. It’s perfect for creating stiff, structured bows.
- Experiment with different textures: Don’t be afraid to try out ribbons with different textures, like velvet, lace, or even ruffled edges. Each one adds a unique touch to your bow.
- Adjust the loops: If your loops look a little wonky, don’t panic. You can always adjust them by gently pulling or pushing them into place until they’re perfectly symmetrical.
- Practice makes perfect: Like any skill, making bows gets easier with practice. The more you do it, the better you’ll get at creating those flawless shapes.
Common Mistakes to Avoid When Making Bows
Let’s face it, we’ve all made a few mistakes when trying something new. Here are some common pitfalls to watch out for when learning how to make a bow out of ribbon:
- Not measuring correctly: Cutting your ribbon too short can ruin your bow. Always err on the side of caution and cut a little longer than you think you need.
- Over-tightening the center knot: If you pull the knot too tight, it can squish your loops and ruin the shape. Keep it snug, but not too tight.
- Skipping the trimming step: Trimming the ends might seem like a small detail, but it can make a huge difference in the overall look of your bow. Don’t skip it!
How to Personalize Your Bows
Once you’ve mastered the basics, it’s time to get creative. Here are a few ideas for personalizing your bows:
Add Some Bling
Why not add a touch of sparkle to your bows? You can use glitter glue, rhinestones, or even sequins to give them an extra pop of shine. Just be careful not to overdo it—you don’t want your bow to look too busy.
Mix and Match Ribbons
Another fun idea is to mix and match different types of ribbon in one bow. For example, you could use a wide satin ribbon for the loops and a narrow lace ribbon for the center knot. The possibilities are endless!
The Importance of Practice
Let’s be real for a second. Making a perfect bow doesn’t happen overnight. It takes practice, patience, and a willingness to learn from your mistakes. But trust me, the more you do it, the better you’ll get. And once you’ve got the hang of it, you’ll be amazed at how quickly and easily you can whip up a beautiful bow.
Think of it like learning to ride a bike. At first, you might wobble and fall a few times, but eventually, you get the hang of it. And before you know it, you’re cruising down the street like a pro. Same thing with bows—stick with it, and you’ll be crafting like a champion in no time.
Final Thoughts: How to Make a Bow Out of Ribbon
Well, there you have it, folks. You now know how to make a bow out of ribbon like a true DIY queen (or king). Whether you’re wrapping gifts, decorating your home, or accessorizing your outfits, this skill is sure to come in handy. And who knows? You might even discover a new passion for crafting along the way.
So go ahead, grab your ribbon and scissors, and get to work. And don’t forget to share your creations with the world! Leave a comment below to let me know how your bow-making journey is going, and be sure to check out some of my other DIY tutorials while you’re here. Happy crafting, my friend!
References
For more information on crafting and DIY projects, check out these trusted sources:
Table of Contents
- Why Should You Learn How to Make a Bow Out of Ribbon?
- What You’ll Need to Get Started
- Step-by-Step Guide: How to Make a Bow Out of Ribbon
- Tips and Tricks for Perfecting Your Bows
- Common Mistakes to Avoid When Making Bows
- How to Personalize Your Bows
- The Importance of Practice
- Final Thoughts: How to Make a Bow Out of Ribbon
- References

Detail Author:
- Name : Jaden Blick PhD
- Username : kim28
- Email : pgerlach@homenick.com
- Birthdate : 1999-09-07
- Address : 509 Gayle Isle Apt. 041 South Fabianbury, MT 65273
- Phone : 660.969.6216
- Company : Stehr PLC
- Job : Geography Teacher
- Bio : Dolore aut iure ut in natus repudiandae. Saepe repellat illo minus ab temporibus deserunt. Rem nihil et optio eligendi et. Amet ratione et tempore rerum expedita libero.
Socials
tiktok:
- url : https://tiktok.com/@dameon_real
- username : dameon_real
- bio : Consequuntur officiis illum et perspiciatis aut tenetur nihil.
- followers : 2322
- following : 1179
twitter:
- url : https://twitter.com/spinka2016
- username : spinka2016
- bio : Cumque labore dolorem ipsam. Mollitia qui temporibus repellat temporibus magni et. Inventore reprehenderit error ut pariatur exercitationem neque.
- followers : 1373
- following : 521
instagram:
- url : https://instagram.com/dameon.spinka
- username : dameon.spinka
- bio : Quod facere earum distinctio quas. Ea sunt nam error omnis.
- followers : 994
- following : 2610
