Wrapping a present might sound simple, but trust me, there’s an art to it. Whether you’re celebrating birthdays, holidays, or just want to surprise someone special, learning how to wrap a present properly can make all the difference. In today’s world where everyone wants things done quickly, taking the time to wrap gifts beautifully shows thoughtfulness and care. So, let’s dive into this guide and make your presents look picture-perfect!
You’ve probably been there—standing in front of a pile of wrapping paper, scissors, and tape, wondering how to turn that plain box into something magical. Don’t worry, we’ve all been there! Wrapping gifts doesn’t have to be stressful or complicated. With the right techniques and a little practice, you’ll soon be wrapping like a pro.
In this article, we’ll cover everything you need to know about how to wrap a present, from choosing the right materials to adding those finishing touches. We’ll also share some tips and tricks to make the process easier and more enjoyable. Let’s get started!
- What Has Alan Cumming Been In A Journey Through His Iconic Roles And Career
- Sister Act 2 Cast A Deep Dive Into The Memorable Talent Behind The Sequel
Why Wrapping a Present Matters
Let’s face it, the presentation of a gift is almost as important as the gift itself. When someone opens a beautifully wrapped present, it sets the tone for the entire experience. It’s like the cherry on top of a delicious cake. Wrapping a present isn’t just about covering the item; it’s about creating a moment of excitement and anticipation.
Studies show that people are more likely to appreciate a gift when it’s presented well. According to a survey conducted by GiftWrapMagazine, 85% of recipients said they felt more excited about opening gifts that were neatly wrapped. So, if you want your gift to leave a lasting impression, take the time to wrap it right.
Essential Tools for Wrapping a Present
Before you start wrapping, make sure you have the right tools. Having the right materials can make the process smoother and more efficient. Here’s a list of essentials you’ll need:
- Atiana De La Hoya The Rising Star Shining Bright In The Spotlight
- Sophie Rain Spiderman Video Unveiling The Phenomenon Thats Got Everyone Talking
- Wrapping paper (choose something that matches the occasion)
- Scissors (sharp ones make cutting easier)
- Tape (clear tape works best for a clean finish)
- Ribbon or bows (optional, but they add a nice touch)
- A ruler or straight edge (helpful for measuring and cutting)
- Double-sided tape (great for securing ribbons)
Having these tools on hand will save you time and frustration. Plus, investing in quality materials can make your gifts look even better.
Choosing the Right Wrapping Paper
Picking the right wrapping paper is crucial. You want something that complements the gift and the occasion. For example, use festive patterns for holidays, elegant designs for formal gifts, and fun prints for kids’ presents. Here are some tips for choosing the perfect wrapping paper:
- Consider the theme of the event or the recipient’s preferences.
- Choose colors that match the season or occasion.
- Don’t be afraid to mix and match patterns for a creative look.
Remember, the wrapping paper is the first thing people will see, so make it count!
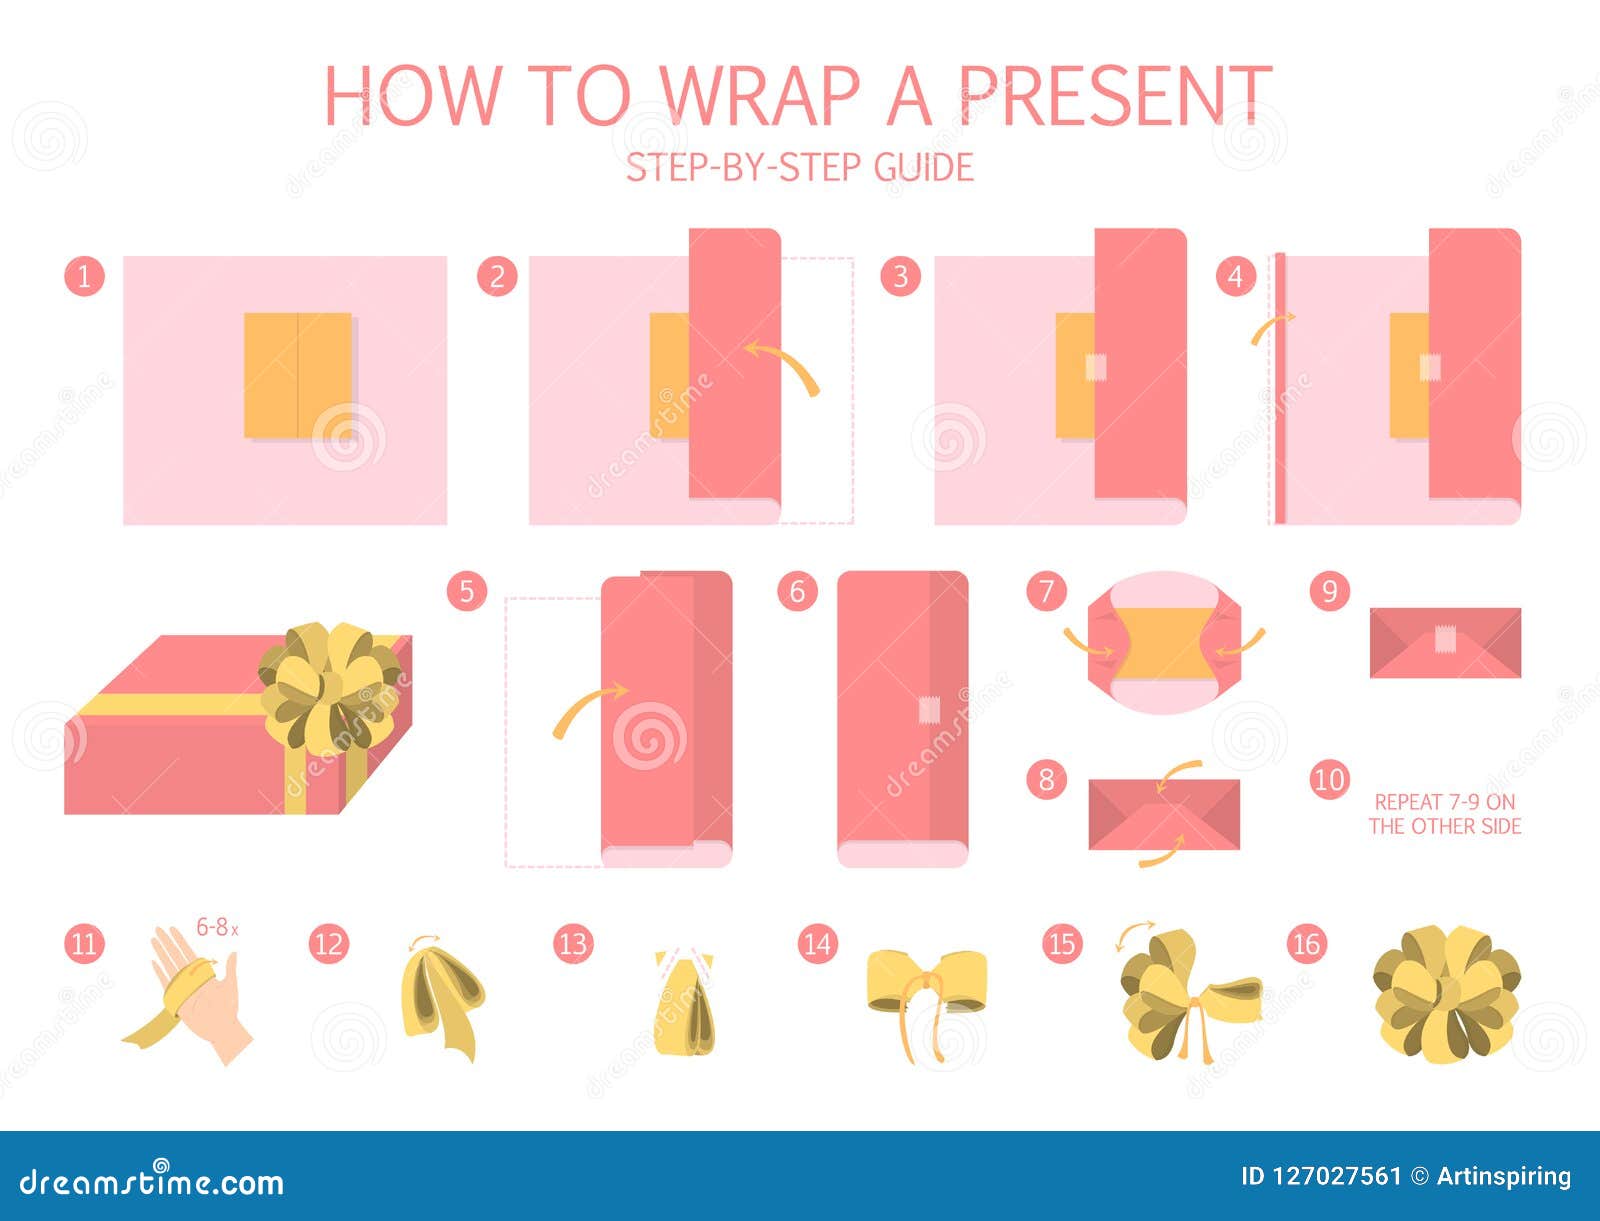
Step-by-Step Guide on How to Wrap a Present
Step 1: Measure the Paper
Start by laying your gift box on the wrapping paper. Make sure the paper is large enough to cover the entire box. A good rule of thumb is to leave about 2-3 inches of extra paper on each side. This will give you enough room to fold and secure the edges.
Step 2: Cut the Paper
Using your scissors, carefully cut the paper along the edges. Be precise to avoid wasting material. If you’re unsure, it’s better to cut a little extra than too little.
Step 3: Wrap the Sides
Place the box in the center of the paper and fold one side over the top of the box. Use tape to secure it in place. Then, fold the opposite side over and tape it as well. For a cleaner look, try overlapping the edges slightly.
Step 4: Fold the Ends
Now it’s time to tackle the ends. Fold one end of the paper over the top of the box and crease it with your fingers. Then, fold the other end in the same way. Use tape to hold everything in place.
Pro tip: For a professional finish, fold the ends like you would a gift bag. This creates a neat triangle shape that looks polished.
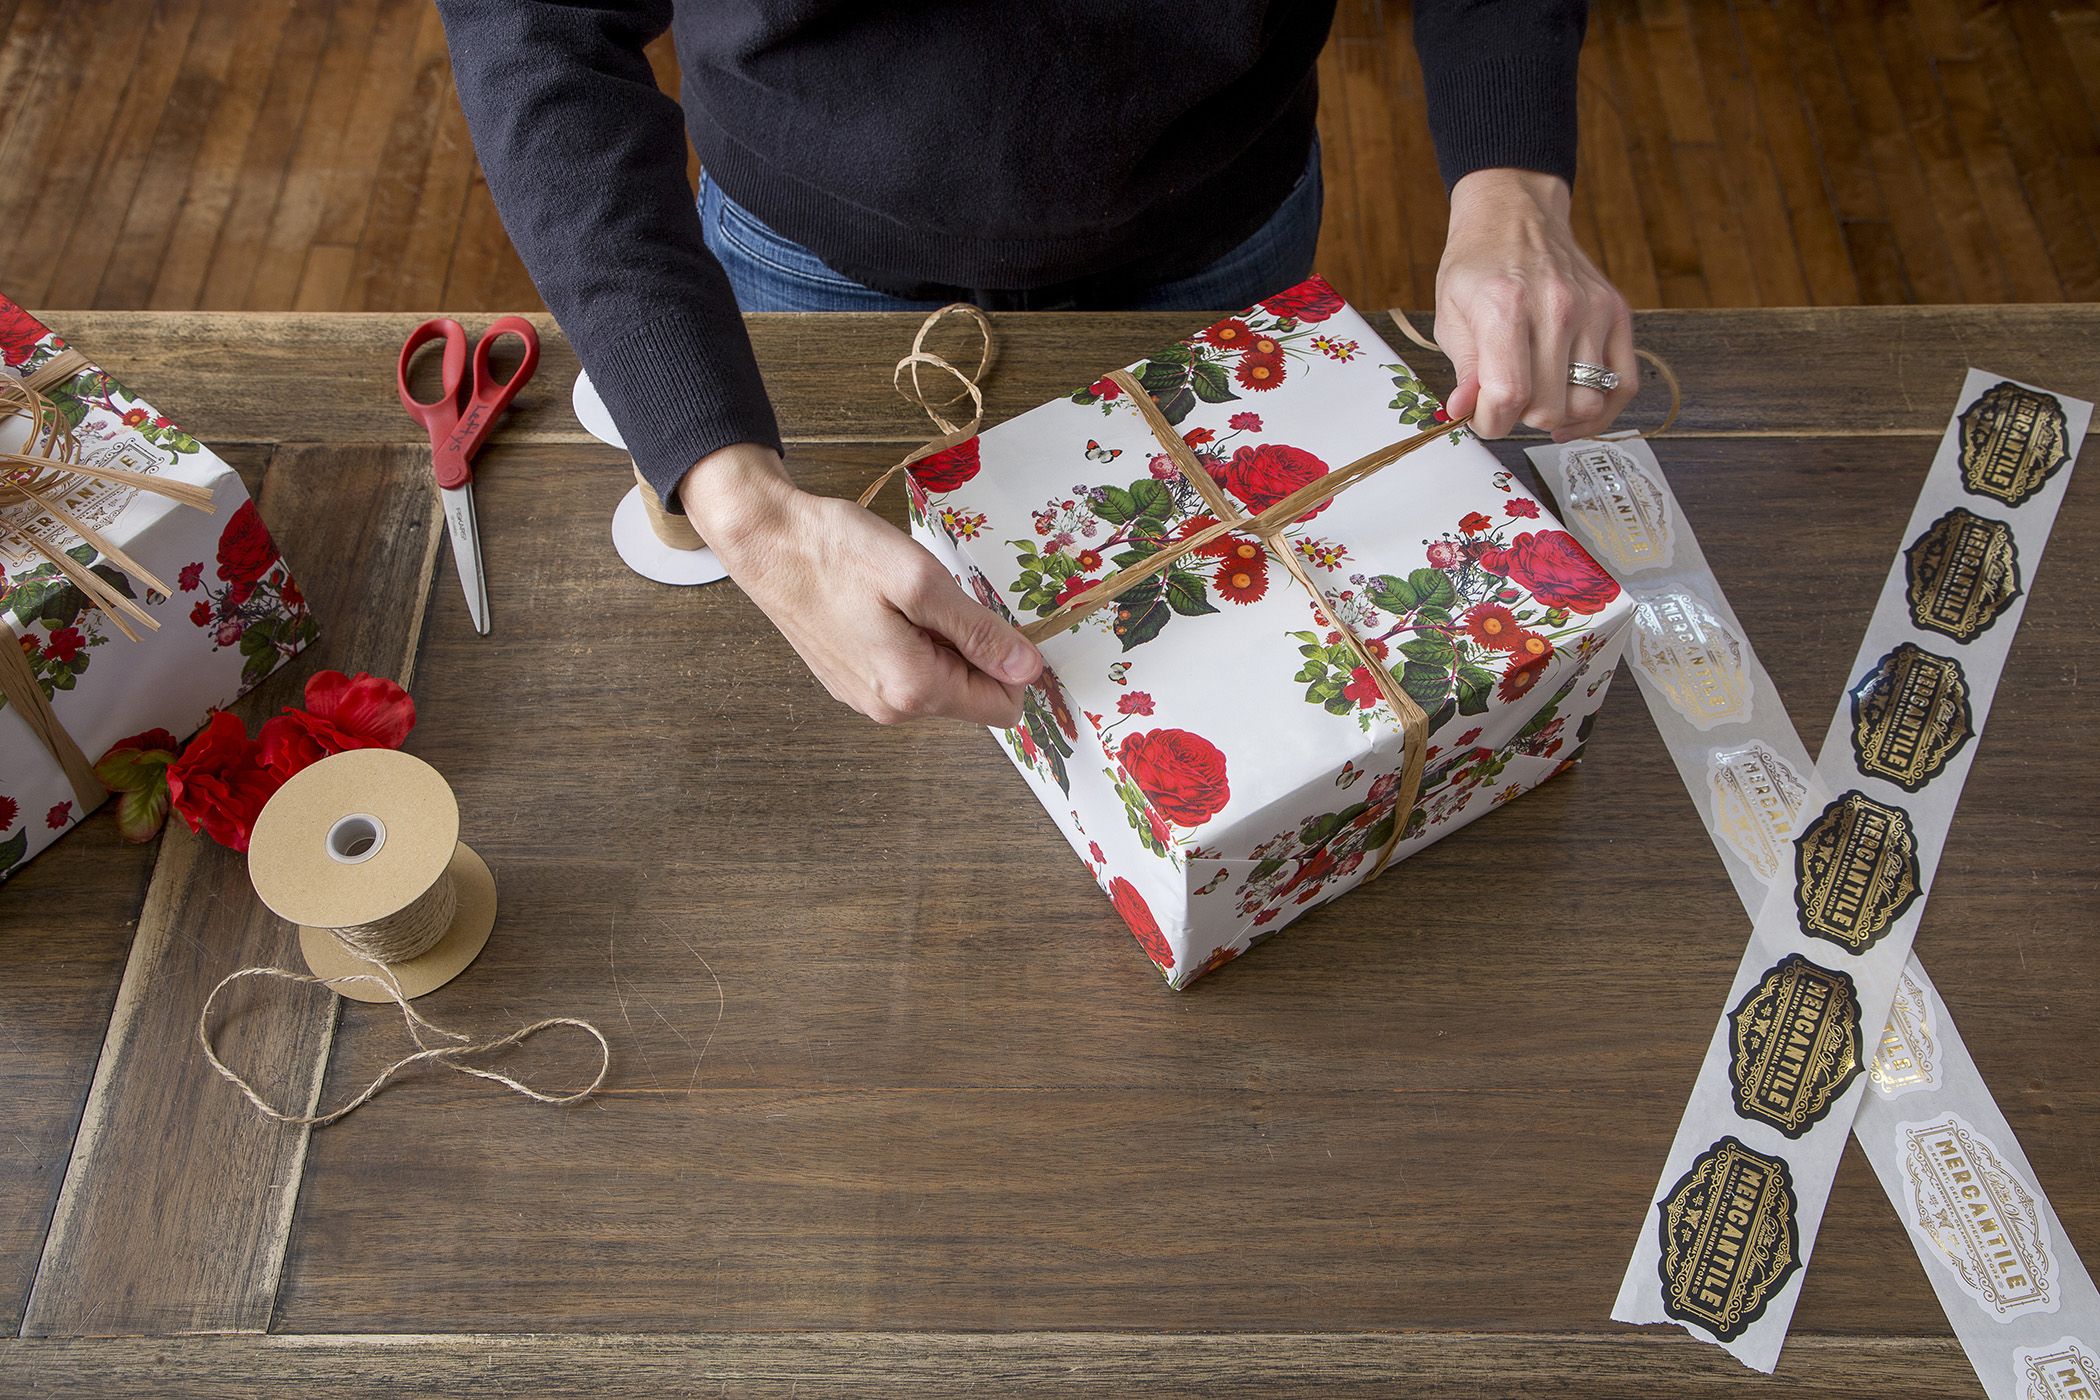
Adding Finishing Touches
Once your present is wrapped, it’s time to add those final details that will make it stand out. Here are a few ideas:
- Tie a ribbon around the gift for a classic look.
- Add a bow on top for extra flair.
- Include a gift tag with a personalized message.
- Use decorative elements like stickers or glitter for a fun touch.
These small details can make a big difference in how your gift is perceived. Plus, they show that you put thought and effort into the presentation.
Tips for Wrapping Irregularly Shaped Gifts
Not all gifts come in neat boxes. Some items, like bottles, books, or toys, have odd shapes that can make wrapping challenging. Here are some tips for wrapping these tricky items:
- For cylindrical objects, use a tube-shaped wrapping paper or wrap the item in tissue paper first.
- For irregular shapes, try using a gift bag instead of traditional wrapping paper.
- If you’re wrapping something fragile, add padding with bubble wrap or tissue paper before wrapping.
With a little creativity, you can wrap almost anything and make it look amazing.
Common Mistakes to Avoid When Wrapping a Present
Even the best gift wrappers make mistakes sometimes. Here are a few common pitfalls to watch out for:
- Using too much tape, which can look messy and ruin the appearance.
- Not measuring the paper correctly, leading to uneven edges.
- Forgetting to double-check the gift before wrapping, which can result in last-minute fixes.
Avoiding these mistakes will help you achieve a professional-looking result every time.
Gift Wrapping Ideas for Different Occasions
Different occasions call for different styles of gift wrapping. Here are some ideas to inspire you:
Holiday Gifts
Use festive colors like red, green, and gold. Add snowflakes or Christmas trees to the wrapping paper for a seasonal touch.
Wedding Gifts
Opt for elegant designs in white, silver, or blush pink. Consider adding a silk ribbon for a luxurious look.
Children’s Gifts
Choose bright, playful patterns with cartoon characters or fun shapes. Add stickers or glitter to make it extra exciting.
Customizing your wrapping style based on the occasion can make your gifts even more special.
DIY Gift Wrapping Techniques
If you want to take your gift wrapping to the next level, try some DIY techniques. Here are a few ideas:
- Create your own wrapping paper using paints or stamps.
- Make homemade bows using fabric scraps or ribbon.
- Use natural elements like twine or pine cones for a rustic look.
These DIY projects not only save money but also add a personal touch to your gifts.
Conclusion: Mastering the Art of Gift Wrapping
Wrapping a present doesn’t have to be daunting. With the right tools, techniques, and a bit of creativity, you can transform any gift into a masterpiece. Remember, the key is to take your time and enjoy the process. By following the tips and tricks outlined in this guide, you’ll be well on your way to becoming a gift-wrapping expert.
So, what are you waiting for? Grab your wrapping paper and start practicing. And don’t forget to share your newfound skills with others. Who knows, you might just inspire someone else to take up the art of gift wrapping too!
Have any questions or tips of your own? Leave a comment below and let’s keep the conversation going. Happy wrapping!
Table of Contents
- Why Wrapping a Present Matters
- Essential Tools for Wrapping a Present
- Choosing the Right Wrapping Paper
- Step-by-Step Guide on How to Wrap a Present
- Adding Finishing Touches
- Tips for Wrapping Irregularly Shaped Gifts
- Common Mistakes to Avoid
- Gift Wrapping Ideas for Different Occasions
- DIY Gift Wrapping Techniques
- Conclusion
:strip_icc()/BetterHomesandGardens_Howtowrapchristmaspresentslikeapro_colorv3-31d28c233c534c67a884e62b4ef1265b.png)
Detail Author:
- Name : Norma Keeling V
- Username : mkulas
- Email : cruickshank.brock@paucek.biz
- Birthdate : 2007-02-11
- Address : 84859 Coleman Fields Apt. 122 Lake Dayna, MD 04426
- Phone : +18385417143
- Company : Shields, Watsica and Haley
- Job : Production Laborer
- Bio : A voluptatem aperiam quo id est a. Maiores illo reprehenderit saepe. Esse ipsa voluptas dolore illum. A quia vel asperiores omnis ut.
Socials
tiktok:
- url : https://tiktok.com/@margarett2770
- username : margarett2770
- bio : Deserunt temporibus quis aut dolore qui dicta corrupti sit.
- followers : 5432
- following : 537
facebook:
- url : https://facebook.com/margarett_dev
- username : margarett_dev
- bio : Minus quam voluptas explicabo fuga dignissimos.
- followers : 3492
- following : 2876
twitter:
- url : https://twitter.com/myundt
- username : myundt
- bio : Dignissimos quo odio a aut iusto sed consequuntur. Accusamus officiis magnam laboriosam cumque.
- followers : 6318
- following : 453
instagram:
- url : https://instagram.com/yundt1985
- username : yundt1985
- bio : Ipsam asperiores modi ut at sed ut eos. Rerum quasi ut et. Cumque a aspernatur sit.
- followers : 850
- following : 2267
